
(Above) As you can see in our pictures (from different angles), we started off with our pieces for the frames. We currently have four of these pieces constructed. We used some cheap wood to construct our prototype and cut a little space in between the planks on the side (as you can see from the bird's-eye-view). The reason we added the slit in the wood is because we wanted it to be an easier process, getting the net to connect to the planks. We then screwed 2 of the slit planks onto a normal plank in order to create one of the pieces. We repeated our process four times in order to get the entire frame of the bed.
We then began our construction of the bed frames by attaching hinges to 2 of the pieces so that they fold together. We repeated the process twice so that we had 2 frames total. We then started attaching the legs onto the frames.
We then began our construction of the bed frames by attaching hinges to 2 of the pieces so that they fold together. We repeated the process twice so that we had 2 frames total. We then started attaching the legs onto the frames.
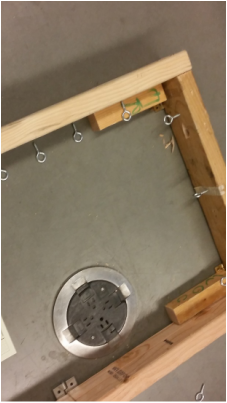
We finally got our eye screws onto our frame in order to put the rope through the holes in the screws. We placed four eye screws on each side of the half and three on the top. That was 22 eye screws in total for each frame. We did this twice so it was 44 eye screws in total.
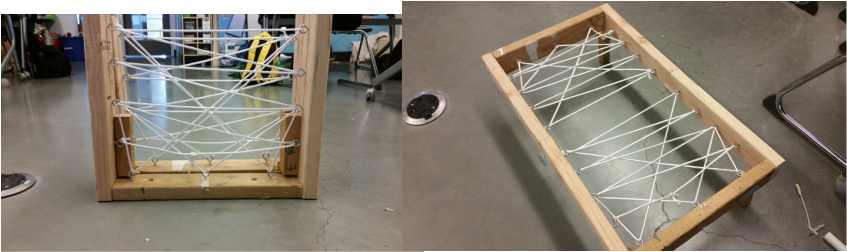
We put on the rope in the pattern we decided on. The design is sturdy, reliable, and will have better back support. These pictures above are the view when it is folded up (left) and when it actually is ready to be used (right).
